Showing posts with label sewing. Show all posts

March 27, 2012

Pattern Testing : Little Bow Zipper Wallet

First off, let me introduce you to one of my favorite craft blogs:


I found Michael Ann Made via Craftgawker last year.  Her chalkboard painted cans caught my eye and I have been a follower ever since.  She always has something inspiring going on over there, her latest being a cute zippered wallet.  I happily offered to test out this brand spankin' new tutorial/pattern, which you can now purchase! 

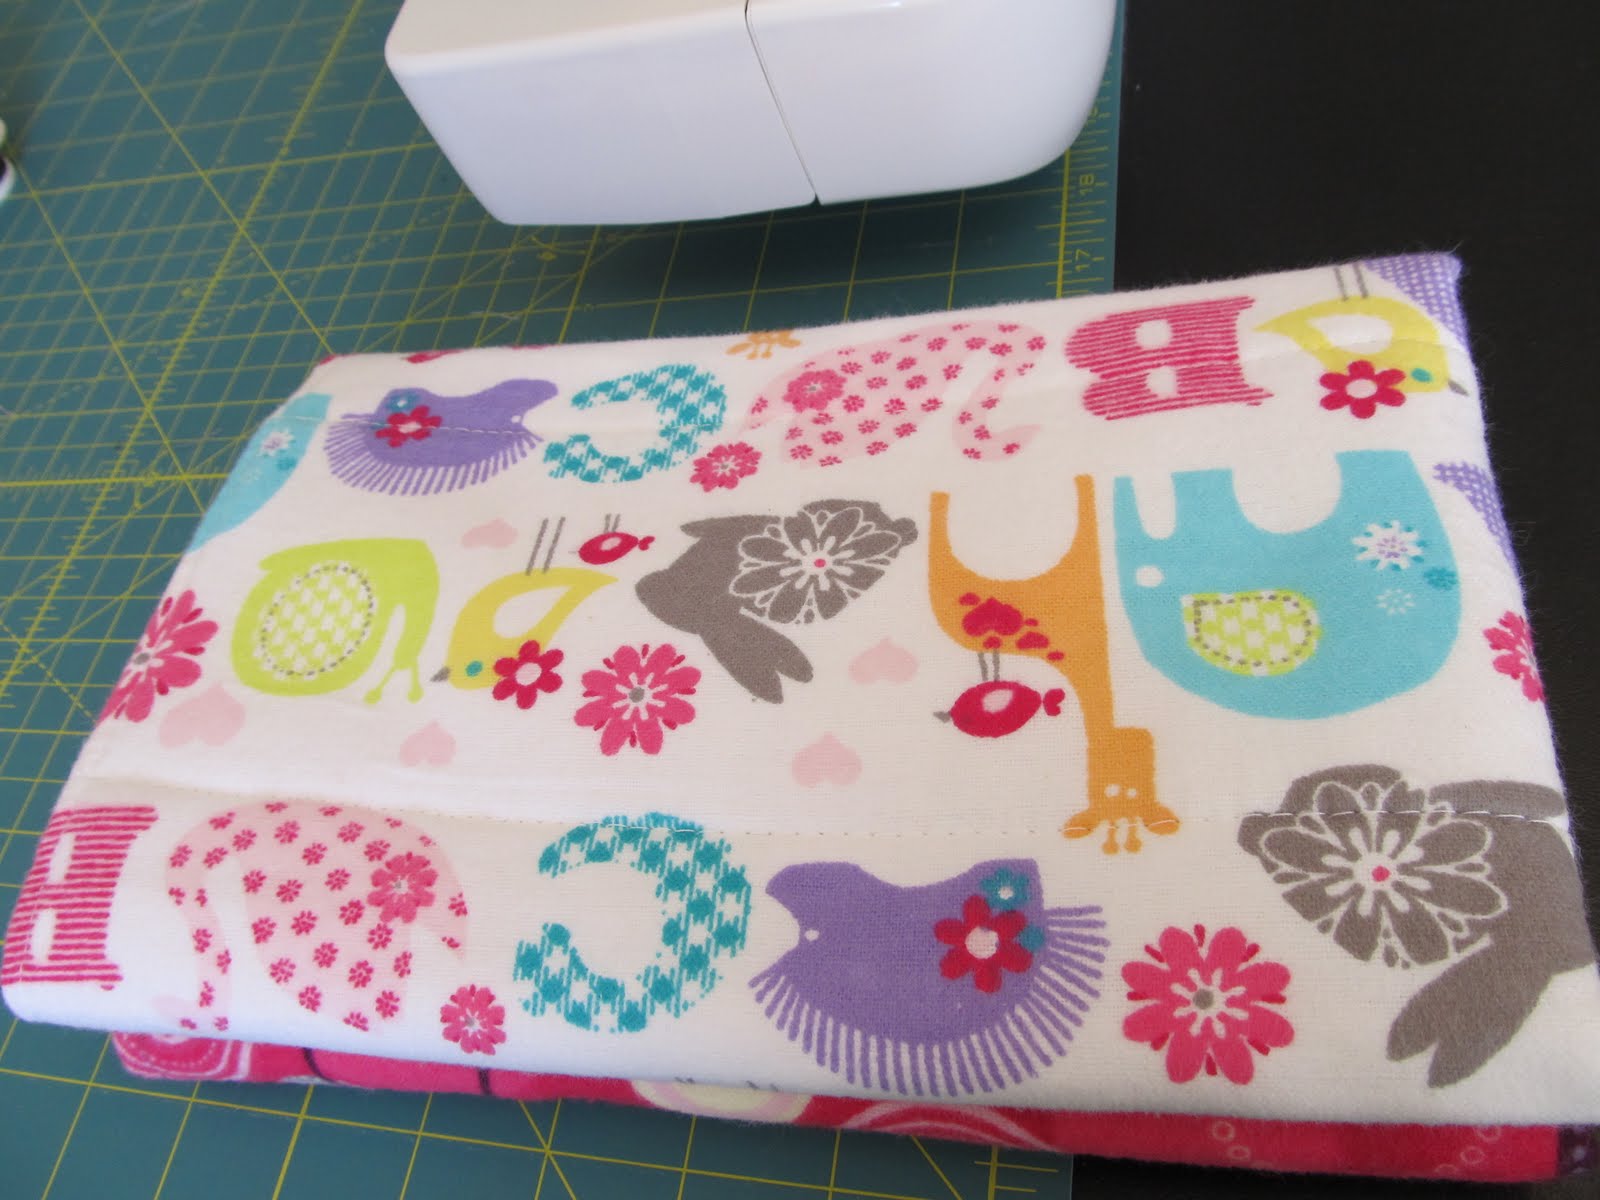
Meet The Little Bow Zipper Wallet.


Isn't it just lovely!?  Michael Ann emailed me the 3 PDF files (pattern, tutorial with pictures, and text instructions) and I downloaded and printed them.  Although I predicted it would take me about an hour to complete, I ended up spending more like 2 1/2 hours on it. There are a few things you have to sew by hand which added a bit of time.  The tutorial was clearly written and very detailed.  The nice thing about this compared to a pattern you would buy at a store is that there are pictures!  It is really helpful to see how to do something before trying it.  Michael Ann also includes a few rather insightful tips!  This is a great beginner's sewing project.  You can purchase the pattern and tutorial here for just $5.50!  

*You may notice mine is just a little different than hers.  I decided to lay my ribbon down horizontally rather than vertically because it was not the same on both sides and it looked better this way!  It is also made for a left handed person (the zipper zips from the right side).  This happened by accident :)

February 16, 2012

A Beach Bag


Last week I made this beach bag for my sister to take on her vacation to Hawaii!  What I would give for a white sandy beach and 80 degree weather right now!  Definitely jealous :) After searching for the perfect beach bag pattern and not finding it, I looked to my own stash of bags for inspiration.  I ended up choosing a tote bag from AE that I liked and began studying it's seams, trying to figure out how it was put together.  When I couldn't quite grasp what the pattern would look like for the bottom, I decided to do a little seam ripping. It made much more sense after that!  And I now understand the parts of a bag and the order in which to sew them.  If there were only more hours in the day, I think I could design my own pattern!

January 30, 2012

Fabric Checkerboard : X's and O's Edition


The inspiration for a Valentine version of this age old game came after I ordered some blank bottle caps from Pick Your Plum a few weeks ago.  I purchased them thinking I would make something entirely different, but that didn't pan out.  So I got to thinking and came up with the idea to use them as Checkers pieces.  And my incredible husband suggested using fabric as the board!  


Everything turned out just as I had imagined!  I was going for a tattered look on the board, so the edges are raw and in some spots a little turned up.


To show when a piece has been kinged, another X or O can be placed on top of it (as in the O on the third row from the bottom).


A competitive game - hugs and kisses style, and a bottle of Sparkling Cider sound like the perfect take-a-longs to me, for a romantic afternoon in the park!

October 25, 2011

A Monogrammed Book Band


As I mentioned a couple of months ago, I joined a book club!  We met for the first time a few weeks ago and discussed Saving Cee Cee Honeycut by Beth Hoffman.  It was so much fun to get out of the house and meet up with a bunch of women who also love to read!  We enjoyed stimulating conversation and laughed a lot as we recounted the story of Cee Cee living through the death of her crazy mom and then getting rescued by her generous Aunt Tootie and all her female friends.  While it wasn't my favorite book (not even close!), I did come to appreciate it more and even like it a little bit more as we talked about it.

So what does all this have to do with a book band for my polka dot notebook?  Well, as I read books I like to slap a sticky note on passages and quotes that I really like.  After I finish a book, I flip back through the book and type them up.  Problem was that they weren't organized.  Scattered in different folders and what not, they weren't accessible.  So I decided I would transfer them to a notebook and record new ones as I read.


That way, they are all in one place.  And I can go back and read through them with a flip of the page.  I have quite enjoyed writing them all down and it has made me want to reread some of the books.

So here's the how to and used what?


I dug through my stash of fold over elastic and found a piece that matched, wrapped it around my book and cut it an inch smaller than that, sewed it together and hot glued a chip board letter over the seam.  All in one breath.  That quickly.


I like it because it is thin and it won't fall off!  I can keep it securely attached while I am jotting down notes.  And if I want to slip a piece of paper in between the cover and first page, it won't fall out.

           
And I decided to write it all in cursive.  For fun.  I almost always write in manuscript, so this is a nice change.  Plus there is something really lovely about flowing, connected letters and it reminds me of my mom.                                                        

October 13, 2011

A Symbol of Hope


A couple of Christmas's ago we gave some money to a young couple to help with medical expenses associated with the treatment of the wife's breast cancer.  It went into remission not long after.  Last night I learned that it is back and the cancer has spread.  I personally don't know this woman, but my heart breaks for her.  She is young-in her 20's.  She is a mom to 2 little ones.  I can't even begin to imagine what she must be going through.  

Since October is National Breast Cancer Awareness Month, I thought I would help spread the word.  I have been following The Project Queen for the past few weeks as she has posted something pink as well as a breast cancer fact every single day.  Did you know that on average, 112 women die from breast cancer every day?! EVERY DAY!  That is an alarming number!  Early detection is key to fighting and beating this malicious disease. If you are a woman, (no matter your age) check your breasts regularly!  And if you are 40 or over, it is recommended that you get a mammogram every 1-2 years.  The most common signs of breast cancer are: a lump in the breast; abnormal thickening of the breast; or a change in the shape or color of the breast.  Check them often, ladies!

In lieu of this special month, I made a little something.  And it's pink: 


In hopes that women everywhere will make breast exams a part of their preventative healthcare.


And that someday a cure will be found!

The Hope Scarf is such a simple design.  The most beginner of beginning sewers can pull it off easily.  I encourage you to make one and spread the word!

Materials:
-1/2 Yd Pink Jersey Knit Fabric
-Scissors
-Thread
-Sewing Machine

Step 1:  Cut It
Cut your fabric in half lengthwise.

Step 2:  Sew the 2 Pieces Together
With right sides together, pin 2 of the short ends to each other.  Sew with 5/8" seam allowance.

Step 3:  Adjust the Length
Try it on.  Adjust the length to your liking with a few snips.  I cut about 12 inches off mine.  No need for finishing the raw edges because they won't fray!  

If you don't sew, no sweat!  You can still "make" one.  Simply go the fabric store and get a 1/2 yard of jersey knit fabric and drape it stylishly around your neck.  Same thing, but a little chunkier and just as cute!  

Hugs to all you women out there fighting breast cancer.  My hope and prayers are with you!

*update:
The Hope Scarf could be YOURS!  I have whipped up another one and will be participating in One Artsy Momma's "Un-giveaway for the Cure", which is basically a silent auction.  The scarf will be given to the commentor who bids the highest amount.  All proceeds will go directly to The Susan G. Komen Foundation.  Come back Wed, Oct. 19 for your chance at The Hope Scarf!

CLICK HERE TO MAKE A BID


September 15, 2011

Sweater Upcycle

Source
This cardigan has been hanging neglected and unloved in my closet for the past nine months.  I ordered it online from American Eagle and when I got it, it was just a little bit too big.  Instead of going through the hoopla of sending it back I thought it would probably shrink if I washed it in hot water and then it would fit just right.  So I washed it, but to my dismay it didn't shrink.  And into the closet it went.  To stay.  

Until I saw this tutorial from Cheri for an upcycled scarflette!!  But I didn't want to use just part of my cardigan.  If I was going to cut the entire back off, I thought I might as well make something out of the front and sleeves!  So I scoured the web for inspiration and here is what came of it:


A Scarflette    Part of cardigan used:  the back


The fountain of my inspiration, this scarflette is the perfect Fall accessory.  A little added warmth to those breezy autumn afternoons is just what I need!  Check out the tutorial.  Followed it to a T.  Super easy! 

A Button Ring  Part of Cardigan Used:  small piece of a sleeve


I was pleasantly surprised to find a package of 8 or so rings at JoAnn's the other day for just a couple bucks!  After covering a button I glued (using E600) it onto one of the rings and voila!   

A Headband    Part of cardigan used:  a sleeve


When it comes to headbands for me, I like to keep it simple.  Flowers make me feel like a little girl, no offense to those who sport the daisies.  Maybe because I am always putting flowery headbands on my baby.  So, all I did was took a long, inch wide strip of the cardigan, folded it in half and sewed down the length of it.  Then I turned it inside out and slipped an old headband into it, finishing it by pulling it snug and sewing a straight line across both ends and trimming off the excess.

A Keychain Chapstick Sleeve   Part of cardigan used:  end of  a sleeve


No how-to or tutorial for this baby.  Would you be interested in one?  It's another super simple project that you could probably figure out just by looking at.  Of all my new accessories, I think I am most excited about this one.  I am always misplacing my chapstick or digging through my purse trying to find it.  Not anymore!

A Sweater Purse   Parts of cardigan used:  both sides of the front and the buttoned collar


And last but not least, the purse.  Complete with a pocket in the front and conveniently-an adjustable strap.  I didn't follow a tutorial or anything on this one.  My inspiration came as I made the other accessories.  I haven't sewn too many things without a pattern or following a tutorial, so this was particularly satisfying!  Although it is a simple purse, it stimulated my desire to design and create.  

And there you have my reincarnated cardigan, ready to live again.                   

August 27, 2011

The Stache Party: Burp Cloths

Stephanie over at My Li'l Pumpkin Patch is hosting her first Stache Party.  For all the details, check out her blog.    Basically you just create something from your stash of crafting supplies or finish an unfinished project and she posts a picture and a link to your blog!  What a great idea!
Today I reduced my stash of flannel and cloth diapers by making a couple of burp cloths.
 Jaime at Sew She Sews has a burp cloth tutorial that I love to use.  These are super easy and make a great gift.  I love their size and thickness.  I just wish I would have discovered her tutorial before I had Jayna, she was such a spitter.  At least I will have them for the next baby!

August 10, 2011

A Birthday Bib

Jayna will most definitely need this for the cake smash!
This was my first-ever attempt at making a bib.  I wasn't exactly sure what I wanted it to look like other than the 1.  The ruffle just sort of came to me as I got going.  I simply traced one of her bibs onto my fabric and went from there.  If I had more time I would make another one and take into account seam allowances.  This one fits but is just a wee bit smaller than I would like.  It will work though!

August 8, 2011

Giant Bow Ties as Photo Booth Props

Today I started making props for the party's photo booth.  First on the list were giant bow ties!  I got the inspiration from Grey Luster Girl.
One for Papa Bear, Mama Bear, and Baby Bear.
These are seriously SO easy!!  It's almost a no-sew project and you can put one together in 20 minutes or less. 
Materials:
- a fabric quarter
- piece of steam-a-seam
- fold over elastic (14" per tie)
- velcro

The How-To:

A fabric quarter was just the right amount of fabric for the biggest bow, so you will have some fabric left over if you make the mama or baby ties.   I'm going to give you the dimensions for the baby bow tie and you can adjust them  by 2 inches for the mama or 4 inches for the papa.

Step 1:  Iron your fabric quarter and cut a rectangle 10 1/2" X 9" and a square 3 1/2" X 3 1/2".
Step 2:  Cut a 3 3/4" X 9" piece of Steam-A-Seam

Step 3:  Take your large rectangle of fabric and iron the edges of the shorter sides over, toward the middle.  Then iron the edge of one of the longer sides toward the middle. 

Step 4:  Place your Steam-A-Seam in the middle of your fabric rectangle. 

Step 5:  Fold over the unfolded edge first and then the folded edge so your rectangle has a finished look.  Place a damp washcloth on the fabric and press your hot iron on top for 15 seconds.  Do this to the entire rectangle.  This will result in the fabric stiffening.

Step 6:  Sew along the short edges of the rectangle.

You are done with the main portion of your tie.  Now we will make the band that goes in the middle of the tie.  Grab the small fabric square you already cut.
Step 7:  Fold over the edges of 2 opposite sides.  Then fold in half, hamburger style, with right sides together.  Sew along the edge.
Step 8:  Turn inside out.  Take the main portion of the bow tie and fold accordion style.  Slip the band onto the middle and you are just about done!


Final Step:  Cut a piece of fold-over elastic to measure 14".  Sew a small piece of Velcro to each end and slip through the back side of your bow tie.


April 11, 2011

Comfy & Casual


Wish we had a beach nearby that we could visit in this cute summer dress!  Instead we are trying not to go crazy while we play inside and wait for the snow to melt.

 I have discovered lots of cute clothing tutorials lately and when I spotted this pink knit at JoAnne's I knew just what I'd make:  The Warhol Dress by Dana at Made.  She offers a FREE pattern and a great tutorial.  This was my first time sewing with knits and it was sort of challenging!  At first, I sewed the yoke on with cream colored thread and it did NOT look good.  My crooked stitches screamed homemade, so the perfectionist in me pulled out the good 'ol seam ripper.  Sigh.  And I redid it, this time handstitching the yoke with a hidden stitch.  It looks much more professional and although it was more time consuming I am really happy with the result. Thanks for the great tutorial Dana!
Related Posts Plugin for WordPress, Blogger...