January 30, 2012

Fabric Checkerboard : X's and O's Edition


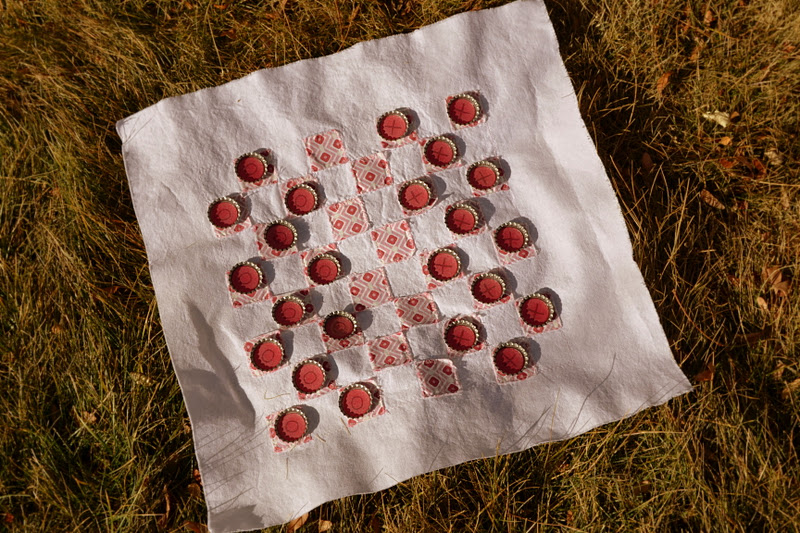
The inspiration for a Valentine version of this age old game came after I ordered some blank bottle caps from Pick Your Plum a few weeks ago.  I purchased them thinking I would make something entirely different, but that didn't pan out.  So I got to thinking and came up with the idea to use them as Checkers pieces.  And my incredible husband suggested using fabric as the board!  


Everything turned out just as I had imagined!  I was going for a tattered look on the board, so the edges are raw and in some spots a little turned up.


To show when a piece has been kinged, another X or O can be placed on top of it (as in the O on the third row from the bottom).


A competitive game - hugs and kisses style, and a bottle of Sparkling Cider sound like the perfect take-a-longs to me, for a romantic afternoon in the park!

January 25, 2012

A Lovely Valentine's Wreath


I don't normally do a lot of V-day decorating, but I thought I might get a little more into it this year.  So to start off, here is a lovely little wreath.  I used the same red berries it had on for Christmas, just bent them into hearts and then added a paper banner.  $.25 update!!


To make the banner, I cut a little notch at the top of each pennant, folded it over twine and hot glued it down.


Then I just found a space in between those twisted twigs, slipped the twine in and tied a little knot to hold it.  Twig wreaths are such great decor because they can so easily be changed with the seasons and holidays!


January 16, 2012

Birthday Gift Idea: Indoor Hop Scotch


This idea is pure genius!  Bubble wrap and Hop Scotch, together?!  What little girl wouldn't go crazy over this?  It's a perfect indoor activity for a cold winter's day.  And thanks to giver'slog, I am sending this as a birthday present to my niece first thing tomorrow morning!  I know she will LOVE it.


Want to make one too?  Here's how I did it:

Gather Materials:  Cardboard Box, Bubble Wrap, Yarn, Scissors, Hole Punch, and Sharpies

Step 1:  Cut 10 12"X12" squares of bubble wrap and 2 slightly larger pieces of cardboard.

Step 2:  Using permanent markers, write numbers on the flat side of bubble wrap.
Be sure to write them backwards!

So they look like this when right side up!

Step 3:  Punch holes along each edge of both cardboard pieces

Step 4:  Write the rules down on one of the pieces of cardboard.  They can be found here.

Step 5:  Tape a quarter to the other side.

Step 6:  Sandwich the bubble wrap between the two pieces of cardboard and  thread yarn
 through the holes.  I put a piece of tape around the end of the yarn for easy threading.

Step 7:  Decorate the front however you want!
I'm going to mail this, so I addressed it and it's now ready to take to the post office!

Go ahead, make someone's day!
Related Posts Plugin for WordPress, Blogger...